Join us for an extraordinary experience at the Bali Online Summit from Nov 12 – 17More info

    Quick Facts

  • Sanskrit (Original): Parivṛtta Pārśvakoṇāsana
  • Etymology: Revolve (parivṛtta); parsva (side); angle (koṇa); pose (āsana)
  • Fun Fact about the pose: Due to the spinal rotation around the axis of the spine the muscles that are concentrically contracting on one side of the body are eccentrically contracting on the opposite side.
  • Asana Type: Standing, Twist
  • Main length muscle groups: muscles_length_muscle_groups
  • Main strength muscle groups: Erector spinae, transversospinalis; rotator cuff muscles, front leg: adductors; back leg: hamstrings, gluteus medius and maximus, adductors
  • Vinyasa Breath: Exhale

How to Cue the Pose: Step By Step

  • 1 Start in a standing position such as Tadasana and step one leg back. The stance is similar to Virabhadrasana I. Traditionally, the back heel is on the ground and the foot is turned 45-60 degrees.
  • 2 Bend the front knee at around 90 degrees, keeping the knee stacked above the ankle. Beware that the knee does fall neither inside nor outside.
  • 3 The back leg remains straight and active. Push the outside of the back foot firmly down toward the mat and pull the knee cap up.
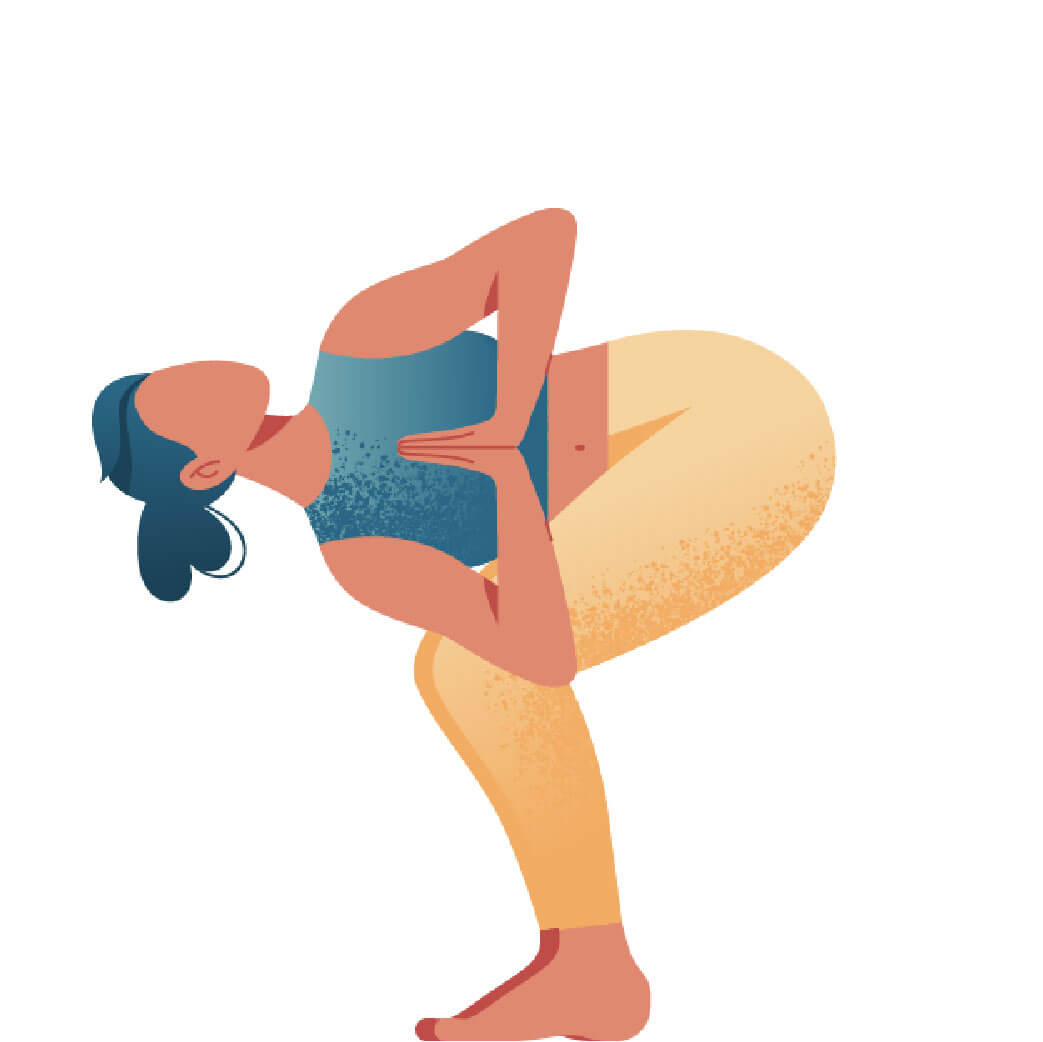
  • 4 Bring the hands in Namaste in front of your chest.
  • 5 On an inhale, lift the sternum and the chest up to create length in the spine. At the same time, pull the navel in to engage the core.
  • 6 On the next exhale, start twisting your torso toward the front leg.
  • 7 Hook the opposite upper arm onto the outside of the front thigh.
  • 8 Push your upper arm into the thigh and firmly press the palms of your hands together to deepen the twist.
  • 9 Make sure your sternum faces to the front or toward the ceiling rather than to the ground.
  • 10 Keep the neck long and neutral, i.e. look to the front or down.
  • 11 Once in the twist, create length in the spine by lifting the chest with every inhale and deepen the twist on each following exhale.
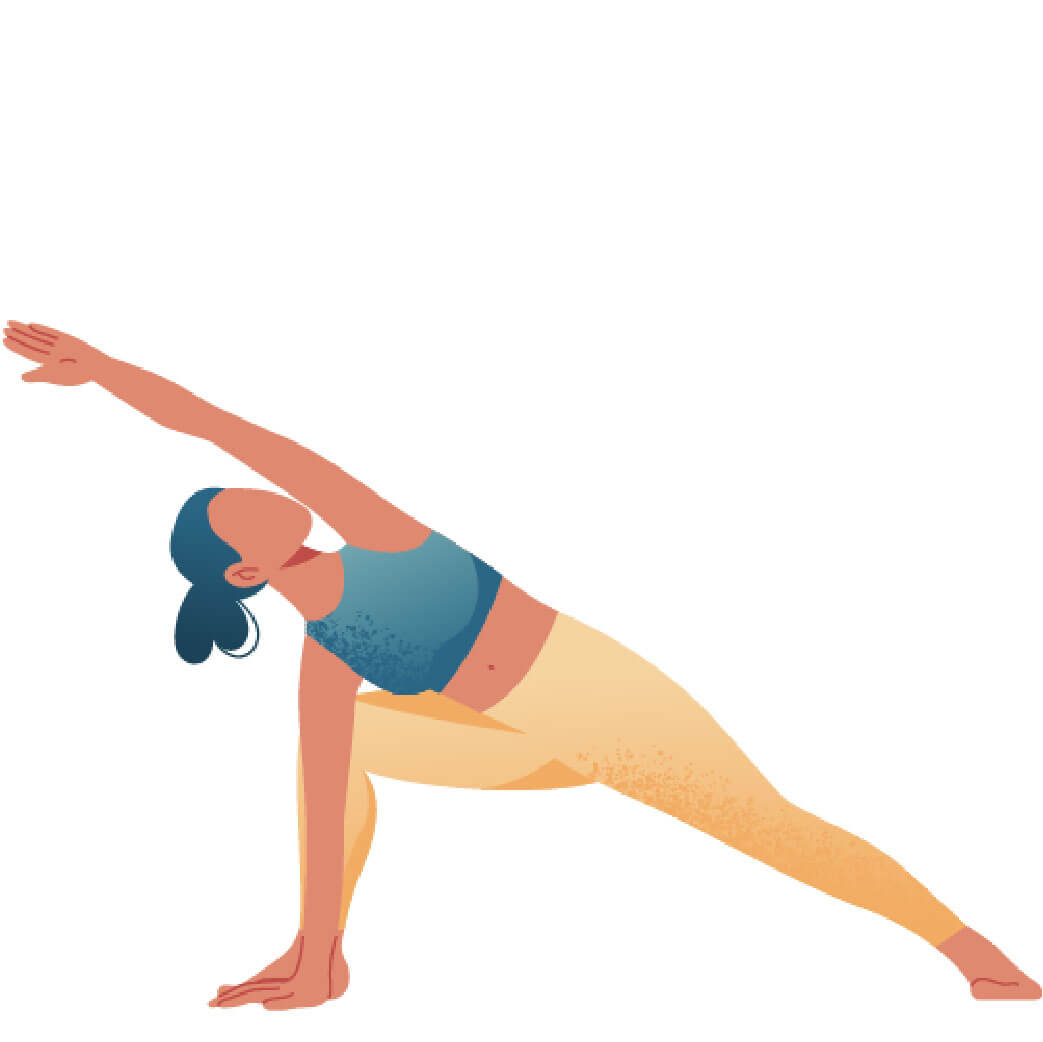
  • 12 You also have the option here to extend your arms: Place the bottom hand on the ground or on a block on the outside of the front leg. The other arm reaches up and above your head.
  • 13 Use an inhale to come out of Parivrtta Parsvakonasana: Pull the navel in and up to engage the core muscles and lift your torso up.

Working The Details: Alignment In The Pose

  • Adapt the stance: If you feel you can’t keep the back heel on the ground in Parivrtta Parsvakonasana, you can either lift it or turn the toes further in. Making the stance narrower will evenly give you more space in the pose to twist. You can also make the space between front and back foot a little wider. Instead of placing the heels in one line, widen them as if you were standing on train tracks.
  • Keep the back leg active: With so much going on in your front leg and upper body, the back leg is often neglected and tends to passively hang into the pose. However, you will gain more stability if you keep the back leg active and as straight as possible. To do so, push the back thigh back and up and the heel back and down.
  • Beware of your front knee: Just like in Utthita Parsvakonasana, a large portion of your bodyweight is on your front leg, putting your front knee in a very vulnerable position. Therefore, it is crucial to keep the knee perpendicular to the ankle. This means that it should neither move beyond the ankle nor to the inside or outside. If you place one hand on the ground, you can use your forearm to stabilize the knee.
  • Use your breath: Breathing becomes even more important in twisting poses like Parivrtta Parsvakonasana as it can help you to deepen your twist. In general, you focus on lengthening the spine with every inhale and use the exhale to rotate the spine further.
  • Twist from the lower spine: Although the cervical spine allows for most rotation, avoid doing all the twisting with the neck. Start the movement from the lumbar spine and work your way up. This may make the pose look less twisty, but makes it healthier for your spine. You may actually feel better if you don’t twist the cervical spine that much but keep it neutral and look straight forward instead of up.

Adapting The Pose Through Modifications

Simplify

  • Adapt your stance in such a way that you feel you can twist comfortably. This may mean lifting the back heel, narrowing the stance or increasing the lateral distance between your feet.
  • Place your hand or fingertips on a block if you can’t reach the floor. You can also simply keep the hands in Namaste and let the forearm rest on the front thigh.
  • For a less deeper twist, place the hand on the inside of the front leg. The other hand can remain on the back hip for a less strenuous variation of Parivrtta Parsvakonasana.

Level Up

  • Give your core muscles an extra workout by keeping your hand in the air. This means, when you twist to the side, you let neither your forearm rest on the thigh nor put your hand on the ground. This way, your abdominal muscles have to hold the weight of your upper body.
  • Go for a bind by wrapping the top arm around your back and reaching for the front thigh. If you want even more, lift the bottom hand off the floor to grab the other hand behind your back.

Benefits of Parivrtta Parsvakonasana

  • This pose is great to build strength in the legs. The front leg especially has to carry the main portion of your body weight and will, thus, become stronger with practice. If the knee is correctly aligned, this is a great position for it to gain both more mobility and stability.
  • Keeping the torso stable while bending and twisting requires a lot of core strength, which is why this pose strengthens the abdominal muscles as well as the pelvic floor.
  • Twisting poses in general stretch the back muscles resulting in more spinal flexibility and mobility. Especially since it moves the spine in a way that we rarely do in our everyday life.
  • The deep rotation of the upper body provides a quite intense abdominal massage and can, thus, improve circulation into the abdominal organs and help your digestion.
  • The strong focus on the breath calms your nervous system and trains your awareness for your breath, which helps you to turn your attention inward.

This is one of the poses where my ego had to learn that going less deep into the pose is actually better for my body. I rarely place the hand on the ground but focus more on the benefits of twisting at the waist.

Saskia

Content Manager at Inside | Passionate Yoga Teacher

FAQ: Common questions about this pose

The answer here is very clear: it depends. Placing the hand outside the front foot requires a much deeper rotation and, thus, more mobility especially in the spine and the hips. If you feel, for example, that you cannot keep the back foot on the ground, see whether placing the hand on the inside of the front foot makes a difference. Also, some people have longer shins in relation to their arms and will, thus, not be able to cross the arm over the leg. In this case, it’s also a good idea to keep the hand on the inside of the front foot.

Traditionally, the heel of the back foot is on the ground. But since every body is different, this may not be available to every practitioner. Especially if your hip lacks mobility, chances are you’re trying to compensate by twisting the back knee. This puts a lot of strain on the joint and the surrounding muscles and ligaments. In this case, it’s safer to lift the back heel and adjust your hip position instead of jeopardizing your knee stability.

The easiest option is to let your bottom hand rest on a block. Put the block in a position that gives you a solid foundation. Usually, this will mean that you put it inside your front foot and maybe a bit further toward the midline. Also, engaging your muscles helps you to remain stable. Core strength is particularly important here. Engage your abdominal muscles by pulling the navel in and up as if you were wearing a corset. In addition, focus on engaging your back thigh: lift it up and back and push the heel back.