Join us for an extraordinary experience at the Bali Online Summit from Nov 12 – 17More info

    Quick Facts

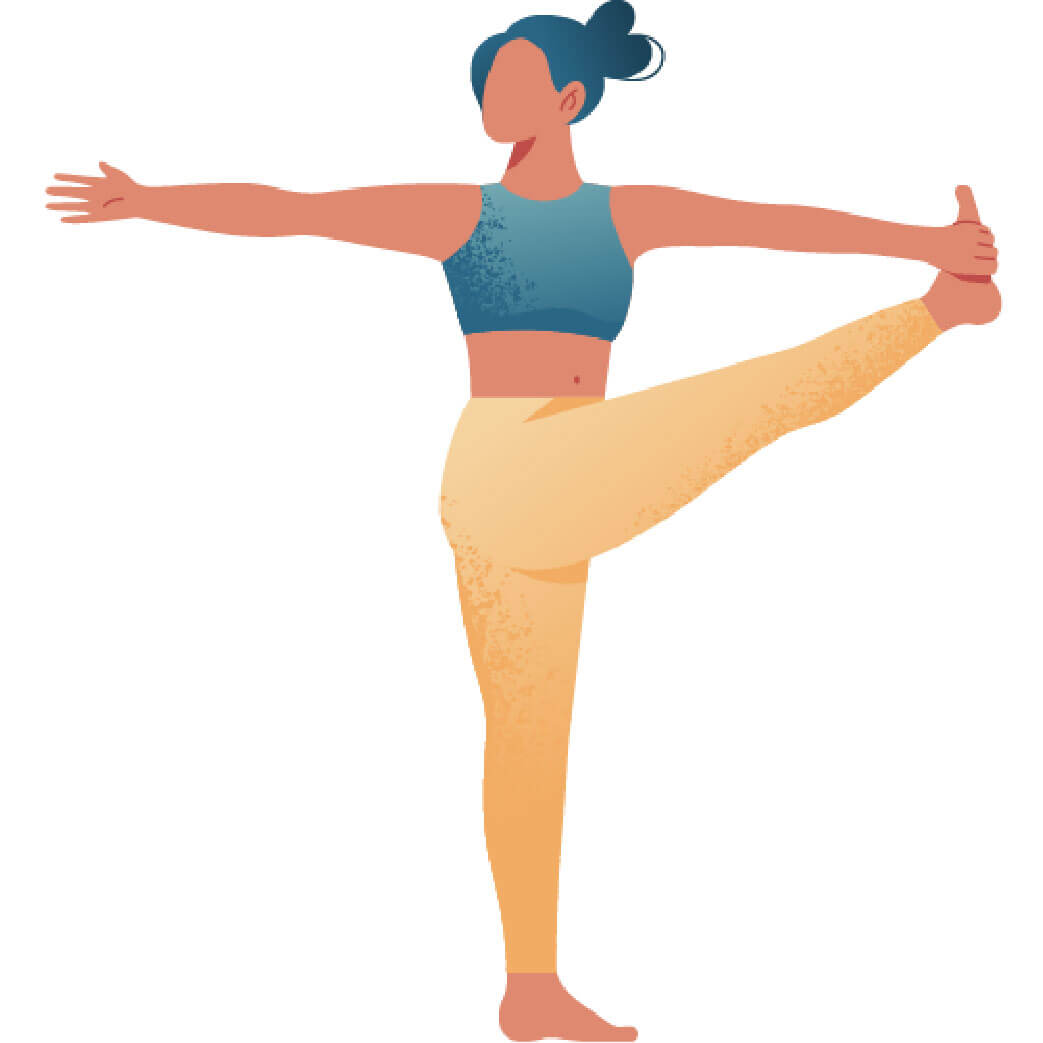
  • Sanskrit (Original): Utthita Hasta Pādāṅguṣṭhāsana
  • Etymology: Extended (utthita); hand (hasta); big toe (padangustha); posture (asana)
  • Fun Fact about the pose: In itself the pose forms a mini vinyasa.
  • Asana Type: Balancing, Standing
  • Main length muscle groups: muscles_length_muscle_groups
  • Main strength muscle groups: Muscles of the feet and legs, quadriceps, core muscles, psoas major, gluteus medius and minimus, piriformis, tensor fasciae latae
  • Vinyasa Breath: Inhale

How to Cue the Pose: Step By Step

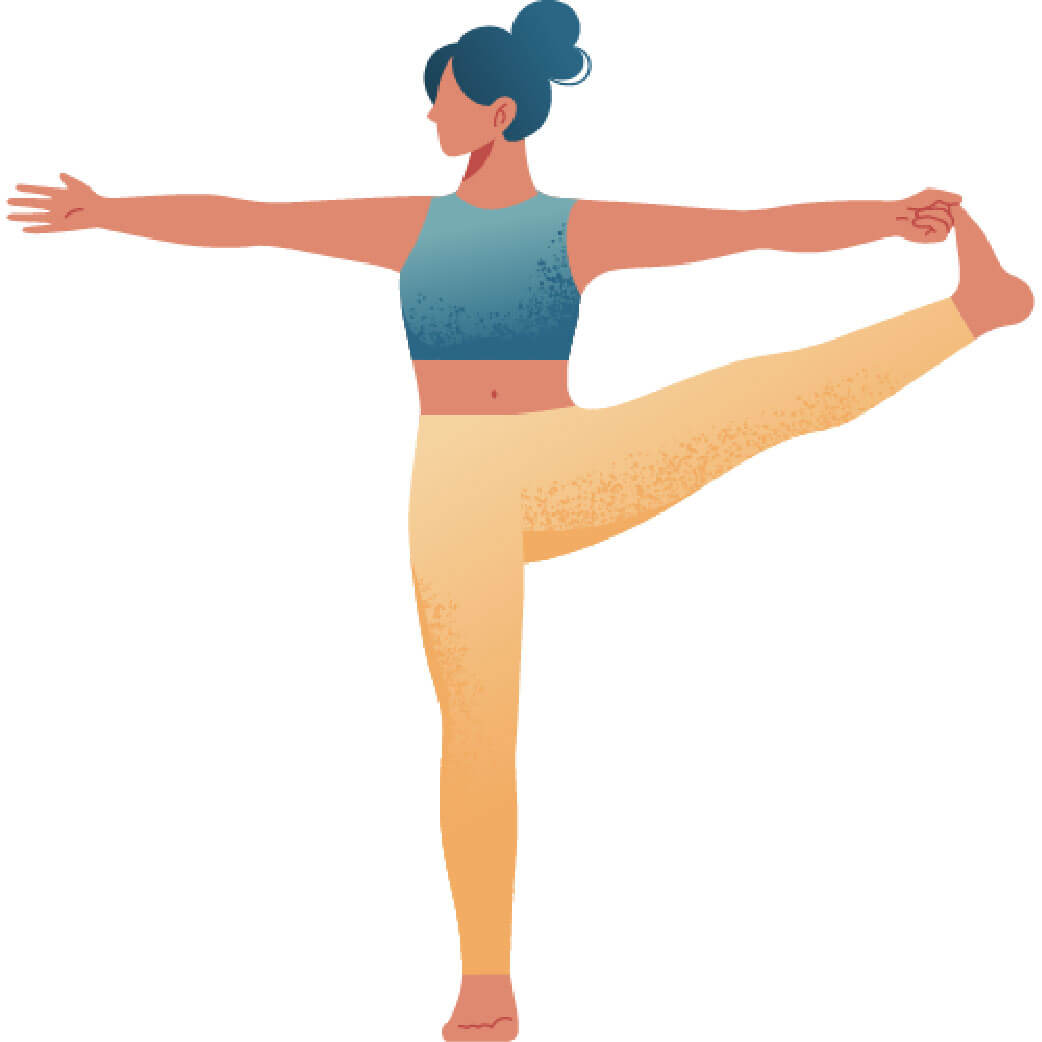
  • 1 Start in Tadasana and spread your feet. Ground your weight into one foot. Then on an inhale lift the knee of the other leg. Stay here a couple of breaths until you find your balance.
  • 2 Catch your big toe of the lifted foot in yogi toe lock (your peace fingers – index and middle finger – and your thumb are locked around your big toe). Inhale to raise the knee higher.
  • Exhale and fully extend the lifted leg and push the foot forward. Use the extended arm to pull the leg back at the same time. You can place the other hand on your hip. Maintain a soft bend in the knee if your knee joint tends to hyperextend.
  • 4 Stay there for a couple of breaths. When you have good balance, grab the extended heel and lift the leg higher. Stay here for two breaths.
  • Optional: For variation II of Utthita Hasta Padangusthasana, rotate the extended leg outwards and extend it to the side. Send your gaze into the opposite direction. Then bring the extended leg back into the middle.
  • 6 On an exhalation bend your torso over your extended leg and let the forehead rest as close to the shinbone as you can.
  • 7 Exhale to release the lifted leg very slowly. Switch to the other side.

Working The Details: Alignment In The Pose

  • Find your Drishti: Drishti refers to a focused and concentrated, yet effortless and mild gaze. A clear placement of the gaze helps you to find and maintain better balance. So think about your Drishti before you get into the pose and try to focus your attention all through the pose and its challenges.
  • Level your pelvis: Practitioners new to this pose can oftentimes be observed pushing the outer hip of the standing leg outwards to be able to lift the extended leg higher. This compromises the alignment of the pelvis. Instead, your goal should be to first have good alignment in the hips and then work on the lifted leg. So, to level your pelvis draw both outer hips towards the center, especially the hip of the standing leg. Let the sit bone of the lifted leg sink down to the floor until it is level with the other sit bone. Imagine a heavy weight on your sit bone weighing it down to the earth.
  • Hug the center: Keep your focus on the middle, even when you are extending out. Draw your thigh bone back into the hip socket while simultaneously extending the foot away from you. Focus on lifting your leg more from your core strength instead of gripping through the hip flexors, which is a common way to compromise when your psoas is rather tight.
  • Work on drawing vertical lines: It is easy to shift all the attention to the flexibility of the extended leg in Utthita Hasta Padangusthasana. However, the primary intention should be to create balance in the standing leg. So work on straightening your standing leg more and more and to find the center of gravity by distributing your body’s weight evenly into the foot. This is the first vertical line. The second vertical line is to work your upper body to become straight. Read the next point on how to achieve this.
  • Draw the shoulders back: Maintain a soft bend in the elbows and suck your humerus (upper arm bone) into the shoulder socket, this will prevent your shoulder blades from protracting. This action will also give you more control to lift your torso upright as there’s less force traveling through the elbow that pulls you down towards your leg.

Adapting The Pose Through Modifications

Simplify

  • If your big toe is too far out of your reach, you have several really good options to work on the detail of the pose in a more simple and modified way. The most important thing here to say is that the primary focus of the pose is on the balance. So it is totally fine to keep the extended leg bent as much as you need to.
  • The most common modification is to use a belt or a yoga strap around your extended foot. Be sure to keep the extended leg active and to not be tricked into lazing into the belt. If you do, don’t worry too much, we have all been there. 😉 The important thing is to be able to notice it.
  • If you don’t have a strap at hand you can interlace your fingers around the back of your thighs. This way you can offer some support for your leg and use the pull of your arms as a lever.
  • Another good option is to place the extended foot on top of the backrest of a chair. Place your hands on your hips. This way you will be able to extend your leg more and work on the upright position of your torso.
  • If all of the above seems impossible for you today, practice the pose in a supine version, lying on your back. Here you can place the foot of the ‘standing leg’ against a wall or cupboard. This way you will keep the reference of grounding and extending the foot into something.

Level Up

  • Bring the foot of your extended leg up and into a wall. From here you can work on straightening out your standing leg and leveling your pelvis with more lift in your leg.

Benefits of Utthita Hasta Padangusthasana

  • Utthita Hasta Padangusthasana is a great pose to improve strength, balance and flexibility.
  • The pose will specifically strengthen and stabilize your feet, ankles and legs. It will also create more strength and stability in your knees.
  • It will improve openness in your hips, arms and shoulders.
  • As this is a challenging standing pose, it will increase your stamina and endurance, as well as your perception of your center line.
  • This pose also improves your sense of balance and concentration – not only physically but also emotionally.

Utthita Hasta Padangusthasana is one of my favorite standing poses, because it challenges me so deeply. I have come to a better understanding of the actions in the position after practicing the supine version of the pose.

Saskia

Content Manager at Inside | Passionate Yoga Teacher

FAQ: Common questions about this pose

A nice way to improve Utthita Hasta Padangusthasana is to build up leg strength, especially in your quadriceps. After practicing the full pose, release the fingers from the big toe but keep the leg lifted. Keep the leg lifted and extended for as long as you can hold it (without gripping too much from the hip flexors). Continue to breathe evenly and suck your thigh bone into the hip socket. Lift the leg even higher before very slowly releasing it down to the floor. You will feel a nice, slow burn in your quads. Adding this strength exercise to the pose will over time help you to lift the upper leg more effortlessly, because you have educated your muscles to do so.

The focus of Utthita Hasta Padangusthasana lies in cultivating and maintaining balance. There are several poses to work on flexibility, but here your primary focus should be on your standing leg, as this will provide your balance. You can start working with a bend in the lifted leg and over time you will notice that you will be able to extend it more and more, as your standing leg becomes more stable and offers you the appropriate support to begin working on your lifted leg.

The common issue behind this question is that your upper body is compromising for a shape that you want to achieve in your lower body – which is yet exceeding your range of motion. To say it more simply, your leg and hip work, namely the short hip flexor, is causing your upper body to move downwards. First of all ask yourself what the main objective of the pose is. See the question above and check if you are working your standing leg. Maybe you have to bend your lifted leg to do this. Maybe you need to use a strap. Check the section ‘SIMPLIFY’ to see which options are available for you to make the pose easier. From here, observe the way you can work your upper body to lift up more and to open up. You can even practice with your back against the wall, to have a surface of reference. Another option is to practice the supine version of the pose. Here your upper body lies directly on the floor and the legs have less opportunity to ‘cheat’. Memorize the range of motion you had lying down and transfer it to the standing position. Observe how this adjustment will make a difference in the alignment of your upper body.